Flange installation is a critical process used to connect pipes, valves, pumps, and industrial equipment securely. A correctly installed flange joint ensures leak prevention, pressure stability, and long-term system safety.
This step-by-step guide to flange installation explains industry-approved methods used in oil and gas, construction, power plants, and manufacturing sectors. Following proper procedures minimizes downtime, maintenance costs, and operational risks.
What Is Flange Installation and Why It Matters
Flange installation involves joining two flange faces using bolts, nuts, and a gasket to form a sealed joint. The goal is to maintain pressure containment while allowing easy system disassembly.
In industrial piping systems, the performance of the joint heavily depends on the quality of the flanges being installed. Using the correct flange type ensures compatibility with pressure class, temperature, and application requirements.
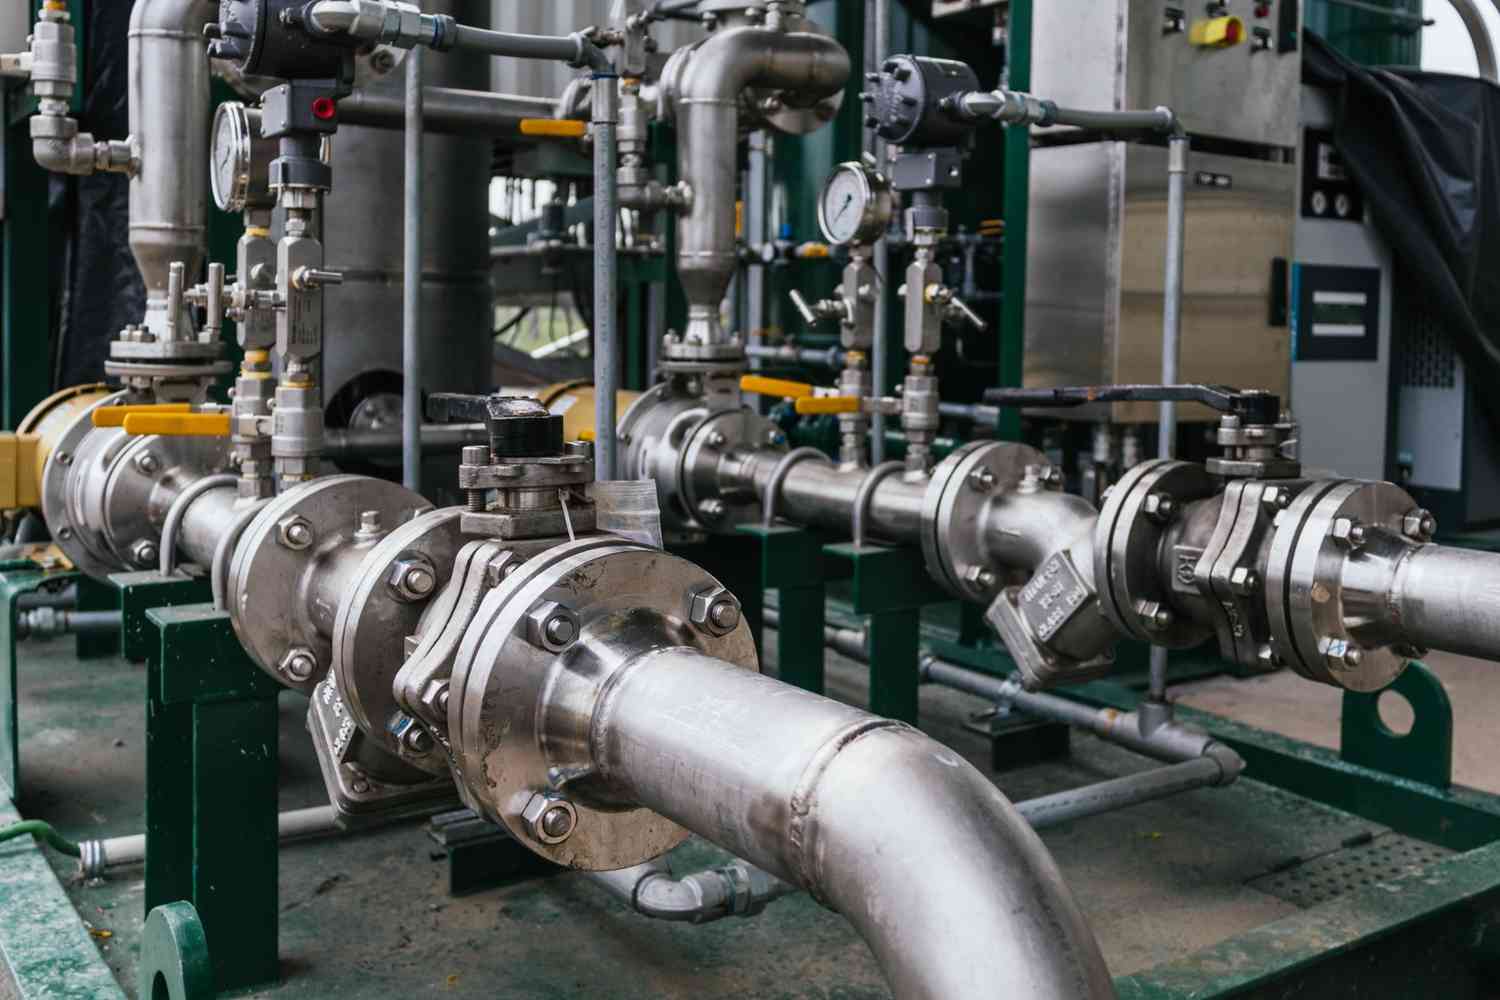
Common Applications of Flange Joints
Flange joints are widely used in pipelines, pressure vessels, heat exchangers, and industrial valves. They allow convenient inspection, cleaning, and system modifications.
Industries operating under high pressure depend on accurate pipe flange installation for safety. Even small installation errors can result in major operational failures.
Tools Required for Proper Flange Installation
Using the correct tools ensures accurate tightening and proper flange alignment. Improper or uncalibrated tools often cause uneven gasket compression.
Essential tools include torque wrenches, bolt tensioners, alignment pins, feeler gauges, and cleaning materials. Personal protective equipment must always be worn during installation.
How to Install Flanges: Step-by-Step Guide
The following steps outline the correct flange installation procedure used across industrial piping systems. Each step focuses on accuracy, safety, and long-term joint reliability.
Step 1: Inspect Flanges and Components
Before installation, inspect flange faces for corrosion, cracks, dents, or surface irregularities.
The sealing surface must be flat and damage-free.
Check bolts, nuts, washers, and gaskets for correct size and grade. Using defective components compromises the flange installation procedure.
Step 2: Clean the Flange Faces
Clean flange sealing surfaces thoroughly to remove oil, dust, rust, and debris. Contamination prevents proper gasket sealing and causes leaks. Use a lint-free cloth and approved cleaning solvent if required. Avoid abrasive tools that may damage flange finishes.
Step 3: Select the Correct Gasket
Choose the gasket based on operating pressure, temperature, and fluid type. Common gasket options include spiral wound, ring joint, and full-face gaskets.
Correct flange alignment and gasket installation are essential for joint integrity. Wrong gasket selection is a frequent cause of joint failure.
Step 4: Align the Flanges Properly
Ensure both flanges are parallel and properly aligned before assembly. Misalignment increases stress on bolts and sealing surfaces. Use alignment pins or flange spreaders if necessary. Never force flanges together using bolts.
Step 5: Insert and Lubricate the Bolts
Insert bolts evenly around the flange, ensuring they are the correct size and grade for the application. Proper bolt placement helps maintain uniform load distribution.
Apply a high-quality lubricant to bolt threads and nut-bearing surfaces. Lubrication improves accuracy during the flange tightening sequence.
Step 6: Perform Initial Hand-Tightening
Tighten all bolts by hand using a crisscross or star pattern. This step holds the flange in position and prevents misalignment. Initial hand-tightening helps seat the gasket evenly. It prepares the joint for controlled tightening.
Step 7: Tighten the Bolts Using a Torque Wrench
Using a calibrated torque wrench, tighten bolts gradually in a star or crisscross sequence. Apply torque in multiple stages to distribute load evenly.
Tighten bolts to approximately 30 percent, 60 percent, and then 100 percent of final torque. Following proper flange torque guidelines ensures a uniform and leak-free seal.
Recommended Flange Bolt Torque Sequence
| Torque Stage | Applied Torque Level | Purpose |
|---|---|---|
| Stage 1 | 30% of final torque | Seats the gasket evenly |
| Stage 2 | 60% of final torque | Balances bolt load |
| Stage 3 | 100% of final torque | Achieves full sealing force |
| Final Pass | 100% (check round) | Ensures uniform tightening |
Perform a final circular check at full torque to confirm all bolts are evenly tightened. This final pass helps prevent gasket blowout and pressure-related leakage.
Step 8: Final Inspection and Retorque
After final tightening, inspect the flange joint for even bolt protrusion and gasket compression. Uneven compression may indicate alignment or tightening issues. In critical systems, retorque bolts after initial pressurization. This compensates for gasket relaxation and thermal expansion.
Common Flange Installation Mistakes to Avoid
- Using damaged or reused gaskets reduces sealing efficiency and increases the risk of leakage under pressure.
Gaskets lose elasticity after use, making them unreliable for flange reinstallation. - Improper flange alignment causes uneven gasket compression and excessive stress on bolts.
This misalignment often leads to early gasket failure and joint leakage. - Incorrect bolt tightening sequence results in uneven load distribution across the flange joint.
This mistake commonly causes gasket blowout during system pressurization. - Over-tightening flange bolts can damage gasket material and permanently deform flange faces.
Excessive torque weakens the joint instead of strengthening it. - Under-tightening flange bolts prevents proper gasket compression and sealing.
Leaks typically appear once the system reaches operating pressure. - Skipping bolt lubrication increases friction and leads to inaccurate torque readings.
Dry threads cause uneven bolt load even when torque values appear correct. - Using incorrect bolt grades or sizes reduces the mechanical strength of the joint.
This can result in bolt failure under pressure or temperature fluctuations. - Ignoring retorque requirements allows gasket relaxation to compromise sealing performance.
Safety Precautions During Flange Installation
Always depressurize and isolate the piping system before starting work. Never attempt how to install flanges on a pressurized line. Use proper lifting equipment for heavy flanges. Follow site safety rules and wear appropriate protective gear.
Best Practices for Long-Term Flange Performance
Conduct regular inspections to check for bolt loosening and corrosion. Routine maintenance extends flange joint lifespan. Maintain records of torque values and gasket materials. Proper documentation simplifies future maintenance and inspections.
AI Overview
Proper flange installation ensures leak-free, safe, and durable piping connections. This guide explains correct flange alignment, gasket placement, bolt tightening sequence, and torque best practices for industrial applications.
FAQs
What is the correct procedure for flange installation?
The procedure includes cleaning flange faces, placing the gasket, aligning flanges, and tightening bolts evenly. Following the correct torque sequence ensures a secure and leak-free joint.
How tight should flange bolts be tightened?
Flange bolts must be tightened in stages using a calibrated torque wrench. Torque values depend on flange size, pressure class, and gasket type.
Why is a star or crisscross tightening pattern used?
A star pattern ensures even pressure distribution across the flange surface. This prevents gasket damage and reduces the risk of leakage.
What causes flange leakage after installation?
Leakage is commonly caused by misalignment, uneven bolt tightening, or damaged gaskets.
Incorrect torque application can also lead to seal failure under operating pressure.
Conclusion
Proper flange installation is essential for achieving a safe, leak-free, and long-lasting piping connection in industrial systems. Following the correct preparation, alignment, tightening sequence, and torque practices helps prevent failures, downtime, and costly repairs.
For high-quality flanges, fittings, and industrial piping solutions you can trust, Mustafa Ashqar Trading LLC offers a reliable product range backed by technical expertise and consistent performance
Contact the team today to meet your project requirements with confidence.
Read More Experts Insights
Explore expert articles on pipe fittings, valves, and industrial materials to help you choose the right solutions for your next project in UAE.
- Different Types of Rubber Sheets and Their Uses: Helps understand sealing materials used to prevent leakage in flange joints.
- Top Signs Your Hose Needs Replacement Today: Explains how worn hoses can impact pressure systems connected to flanges.
- Different Types of Flanges and Their Uses: Provides insight into flange selection before installation and tightening.
- Why High-Zinc GI Pipes Are Trending in UAE Construction: Shows why corrosion-resistant pipes work best with properly installed flanges.
- Seamless vs Welded Pipes: A Complete Guide for Industries: Compares pipe types to ensure correct flange compatibility and performance.